
Main navigation | Main content
April 21st, 2025
In today’s lab, we’ll work out how to perform a few SQL injection attacks against a very simple web app designed for a similar lab at Syracuse university. Keep a running log, queries.md, that describes the SQL injection inputs you find along the way. You’ll probably be able to guess the SQL syntax needed to complete this lab, but if you want a reference, the w3schools site should be sufficient.
In order to perform the attack, we’ll need to set up a web server and DBMS on your VM. We’ll do that using docker. Log in to your csel-xsme-s25-csci4271-NNN virtual machine, and download the server image:
It’s a big file so it will take more than a few seconds to download. Next we’ll import the image into docker:
This, again, will take a few (tens of) seconds to finish. Once it does, you’re ready to start the server:
This boots up a whole web server and database, prints a bunch of stuff, and will eventually print a line saying something like INFO exited: sqli (exit status 0; expected), which means that the web server is up and running. On a CSELabs machine (or VOLE, or your laptop if connected to the UofM WiFi or VPN), you should be able to open a browser and connect to your VM by typing http://csel-xsme-s25-csci4271-NNN.cselabs.umn.edu/ into the location bar. (Substitute the correct value of NNN, of course.) If everything worked out, you should see a form with the title “Employee Profile Information” and two text boxes:
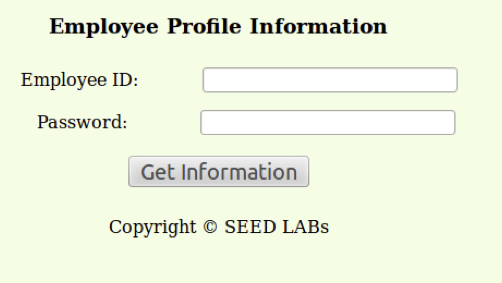
The web app is meant to simulate an employee information system. Users can log in with their employee ID and password, see their company profile, and update some fields of this profile. On the back end, there is a database with a single table; here’s a partial view of the contents of that table:
| name | eid | Password | salary | birth | ssn | nickname |
|---|---|---|---|---|---|---|
| Alice | ** |
** |
20000 | 9/20 | ** |
|
** |
20000 | sha1("seedboby") |
** |
** |
** |
|
| Ryan | 30000 | ** |
90000 | ** |
** |
|
| Admin | ** |
** |
** |
** |
** |
The table also has several fields not listed above: phoneNumber, email, and address, which have, like nickname all been initialized to null; fields shown as ** in the table are left for you to discover (as well as three additional rows). In addition, the database maintains a unique ID number per record that is never displayed by the web app, but is linked to a cookie stored by the user. You can go ahead and log in to the profile for employee 20000 (with password seedboby) to see what a successful login looks like.
When a user submits the form with values $input_eid and $input_pwd, here is an excerpt of the backend processing:
  $input_pwd = sha1($input_pwd);
  $sql = "SELECT id, name, eid, salary, birth, ssn, phoneNumber, address, email,nickname,Password
          FROM credential
          WHERE eid= '$input_eid' and Password='$input_pwd'";
  $result = $conn->query($sql);
Knowing this, how would you log in to Alice’s profile without knowing their password or employee ID? (A few hints: you know the name field for Alice is Alice; the backend database, MySQL, is picky about having closed quotes, even in comments, and uses ; as a statement terminator; and OR is a very useful logical operator in SQL queries.) Experiment in your browser until you find something that works, and then save the resulting page as AliceProfile.html. When you save this and other pages in a file, make sure to select “Web Page, HTML Only” as the format in your browser (e.g., Chrome or Firefox). (Record the form inputs you used in queries.md)
Now that you’ve got Alice working, see if you can log in to the profile for ‘Admin’. You’ll notice that ‘Admin’ can see all of the other users’ profiles. Save this page as AdminProfile.html, and record the form inputs in queries.md
By now you’ll have noticed that on any of these profile pages, you can click a button labeled “Edit Profile.” This button takes the user to a screen where they can update their nickname, email, address, phone number, and password. Here’s an excerpt of the PHP that handles submissions of this form:
if($input_pwd!=''){
     $input_pwd = sha1($input_pwd);
     $sql = "UPDATE credential SET
               nickname='$input_nickname',email='$input_email',
               address='$input_address',Password='$input_pwd',
               PhoneNumber='$input_phonenumber'
             where ID=$input_id;";
}else{
     $sql = "UPDATE credential SET
               nickname='$input_nickname',email='$input_email'
               address='$input_address',PhoneNumber='$input_phonenumber'
             where ID=$input_id;";
}
$conn->query($sql);
Suppose employee 20000 wanted to change their salary to (Dr. Evil Voice) “one MILLION dollars” without making any other changes to their profile. Knowing how the results of the form are processed (but not their id field – which is different from the employee id eid), what query would they use? Experiment in your browser until you’ve managed to update the salary field, then save the resulting profile page (of employee 20000) as Profile1Million.html, and record the inputs you used (fields and values) in queries.md.
SPECIAL EXTRA BONUS ACTIVITY NOT REQUIRED AND WORTH 0 POINTS BUT MAYBE SOME FUN
The vulnerabilities in this web application are not particularly convenient for exfiltrating data from the database, but doing so is possible with most SQL injection vulnerabilities. Building such an attack would be more than a 50 minute lab, but there are tools that have automated the construction of SQL injection attacks, including one named sqlmap that is packaged in Ubuntu. Here are some commands to get you started (running on your VM):
See if you can use sqlmap to dump the entire contents of the credential table.
Even though it’s running in a container that’s not routable outside of the University firewall, it’s still probably not a great idea to leave the web app server running once you finish the lab. Log into your VM in another terminal and run:
To get the container ID (some hex digits, like 1d1d118789b2, but yours will be different) and then run
If you managed to mess up the database or webserver while experimenting with your inputs, this will also wipe out those changes, and once it’s done you can restart the server using the same command as the first time (docker run -i -p "80:80" sqli /run.sh).
Once you’ve shut down the container, you’re all done with Lab 12! Make sure you’ve saved the four files AliceProfile.html, AdminProfile.html, Profile1Million.html, and queries.md so you can submit them to the Lab 12 assignment on Gradescope. Make sure you include all of the members of your group!
Once you’ve submitted the files, the autograder will test to make sure the proper files were submitted, check that they include the right information, and notify you if anything went wrong, within a few minutes.
Congratulations, you’ve finished Lab 12!